


Building a Pallet Mirror
Do you ever have an itch to conquer a project that seems completely unnecessary, but the challenge and thought of taking on such a ridiculous project makes your heart skip a beat? Only me? This was one of those heart-skipping projects I just could not get out of my head.
For over a year we had this huge family portrait hanging above our entry table, and don't get me wrong, I still LOVE the picture. BUT it is a little outdated now that we have added another family member to the bunch.

We love dark wood and reclaimed barn wood for our accent pieces around here (industrial shelving, entry table, stair rail) so, when I came across this picture on Pinterest I got the itch!
I knew this look would be perfect for the entry way, but I did not love the price. Whenever I scoured the internet for a mirror with the reclaimed wood look, mirrors ranged anywhere from $200.00 and up. But, if you look online, you can get a frameless mirror for less than $50 (and free shipping!) and pallets are pretty easy to come by these days, just ask around! (or comment below and I can give you some additional pointers ;) )
Here is the breakdown of what you might spend in total on the project, and the step by step process.
- Mirror — $44.98 (http://www.lowes.com/pd_26325-405-73648___ )
- Pallet — free! ( Don't hesitate to ask builders and landscapers for their trash- your treasure!)
- Liquid Nails — $2.79
- Sand block — $5.47
- Box of 1-1/4in black wood screws — $2.24
- Rustoleum wood stain in Kona 8oz — $5.48
- Rustoleum satin Polyurathane 8oz — $6.62
For your grand total — $67.58 !!!!
Now here is a little step-by-step and some tips I have to offer on the project.

- Start by using any means possible to yank apart the pallet. Then, if you have access to a sawzall, use the sawzall with metal cutting blades to cut right through those nails.
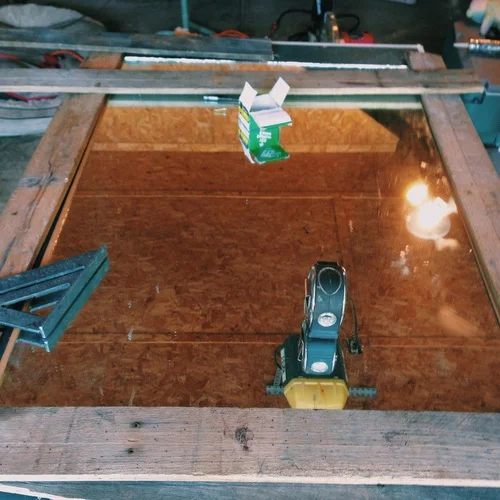
- Next, put your puzzle solving skills to the test! Have an idea of how you want your boards to be arranged around your mirror, turn them and re-arrange them at least 5 times until you are satisfied with the look. My Dad and I glued the mirror on to a thick cardboard mirror backing, and then glued, and screwed the initial boards that I wanted to border my mirror.
- I wanted to make sure my mirror would not move, and I wanted to make sure there was good support (this mirror was extremely heavy!) and I ultimately wanted to build a perfectly-imperfect mirror for our entry. So I layered the boards and screwed them in several places.
- When I got it home, I sanded the pallet wood. The original raw wood was GORGEOUS! I thought about sticking it on my basement walls because I loved the look so much, but then I still would have an entry without a mirror.
- Most of the wood projects in our main living area are all dark stain. My dark stain of choice is Kona by Rustoleum. I applied 2 layers of stain, followed by 2-3 coates of Rustoleum polyurathane.

I went to Lowes and bought a french cleat to hang the mirror. The 18 inch hanger will hold up to 200 lbs on the wall and cost a little over $10! The mirror has been safely hanging on the wall for over a year now.
I absolutely LOVE how our pallet mirror turned out!


